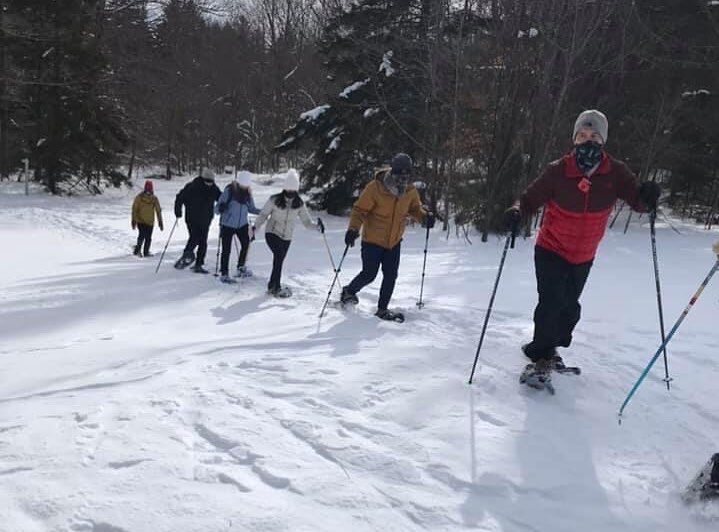
‘Snowshoeing is easy,’ is something you might hear often. “It’s just like walking!” Well, it may be similar, but if it’s a new activity for you, getting to know the gear and having some tips & tricks at hand might be the confidence boost you need to get started. Getting from home to the trail can be quick and uncomplicated!
Conveniently, snowshoeing doesn’t require a ton of specialized equipment, rentals are an excellent way to get comfortable at first, and you can really do it anywhere. Sidewalks, and city parks before they are plowed or shoveled offer the same conditions as a wooded trail. Just remember, no matter where you are, be aware of your surroundings. Use as many senses as you can.
So, what DO you need to get started?
Essentials that you may already have: a comfortable pair of winter boots, good outdoor layers, a backpack, or something similar to carry your supplies. A crossbody bag works just as well, as long as it helps you keep your hands free, it can work.
What to wear: When it comes to dressing for outdoor exercise, if you don’t have high-performance fabrics readily available, that’s ok. You will want three different layers; a breathable base, a warm layer, and a layer to help break wind or precipitation. Your base layer should be something that can wick away moisture as your body temperature rises. Merino wool, polyester, nylon, and silk are all good options. The next layer, is for insulating. Think thick and puffy like wool or fleece. Then comes your outer layer for wind and water protection. A winter coat, even a raincoat, or windbreaker can work.
If you have snow pants or gaiters (knee-high or shorter pieces of waterproof material that go over your pants,) those will be great for keeping you dry and comfortable if you fall or come into deeper snow.
Snowshoeing uses a lot of energy, and you’ll get hot when you’re doing it, so it’s important to have layers to regulate your body temperature as needed.
Essentials you may need to borrow or rent: Snowshoes, and trekking poles.
The snowshoes themselves are designed to help you float over the snow and to have the traction that street shoes and boots aren’t able to give you. Because of the increased surface area of your footprint in a snowshoe, when you begin to move along a flat trail, you will want to lift your knees a little higher than you normally would and increase the width of your steps. If you add the trekking poles for extra stability and balance—you will want to place them slightly ahead of your body as you move,
With that, you’re ready to get started! A few things to keep in mind when you are out:
- Make sure to check the weather conditions before you leave
- In your pack, bring a trail map, water, snacks, an insulating layer, basic first aid supplies, extra gloves, a map of the location, and if possible, a headlamp in case you get stuck at the end of the day. A portable charger is also a good piece of gear, especially since cell phones and mobile devices can lose charge faster in cooler conditions.
- Tell someone where you will be and how long you expect to be out. If possible, bring a friend and travel as a pair.
- Keep your first few treks simple so you can get the hang of moving with the snowshoes on. Locations you know well in regular shoes are excellent places to start.
- If you’re out on a trail, be sure to follow maps and markers, and stay within the trail boundary.
Where to go snowshoeing: The Trustees has great resources for renting snowshoes and for guided winter hikes that may be just the thing to help you get started and, on your way, to a new winter experience. Appleton Farms in Ipswich and Notchview in Windsor both have rentals and trails that may be just right for you to get started.
In the video below, some of the tips we outline here are illustrated really nicely, especially, how to actually put the snowshoe on over your boots.
This short video made by L.L. Bean illustrates some great tips for getting started snowshoeing.


